
R Model Operationalization on Azure - Part 9
Welcome to the last and final part of the series, part 9. In this section, I’ll demonstrate a CD pipeline for deploying our containerized R Model to Azure Kubernetes Service.
Overview & Configuration
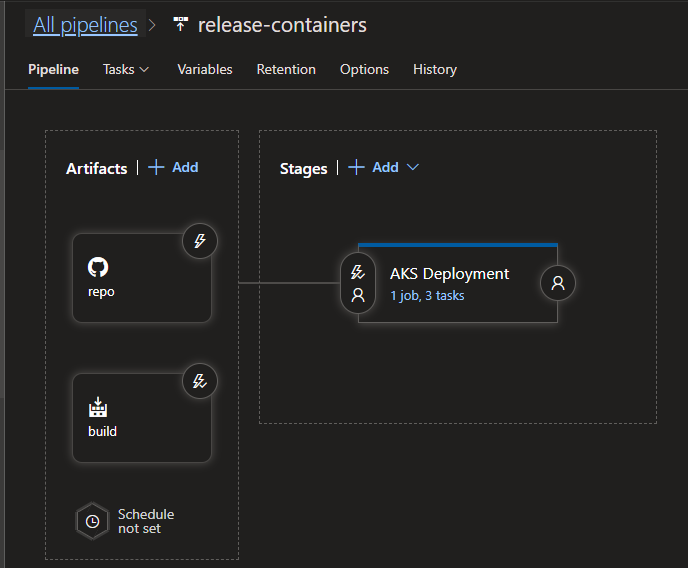
The release to deploy the container is very straightforward. The deployment and configuration of the service is mostly handled by the .yaml file defined from our build, all we need to do is apply the file against an Azure Kubernetes Service cluster. The release pipeline has artifacts representing the master branch of our repo and the build from the previous section, along with a deployment task that simply performs a Kubernetes command.
Note: Our production Azure Key Vault instance is linked to a variable group, but we’re not using any of the secrets from Key Vault in this scenario, since Azure DevOps can natively connect to Azure Kubernetes Service and we don’t have other private keys that need to be read in.
Artifacts
Repo
We have a repo artifact to reference our GitHub repository, with default branch set to master. All we need for the deployment in this case is the .yaml service deployment from the build, but having the repo artifact is nice because it displays the latest commit at release time. It also provides us the option to access files in the repo if we needed to access any of them.
Build
You’ll need to configure a build artifact which points to the ci-rmodel-container build pipeline. In this example, we’ve set the Source alias as build, which will be the path where we can locate the temp.yaml file that was output as an artifact of the build.
We’ll want to enable a CD trigger on this so that the release runs whenever a build has successfully completed for the master branch.

Stage - AKS Deployment
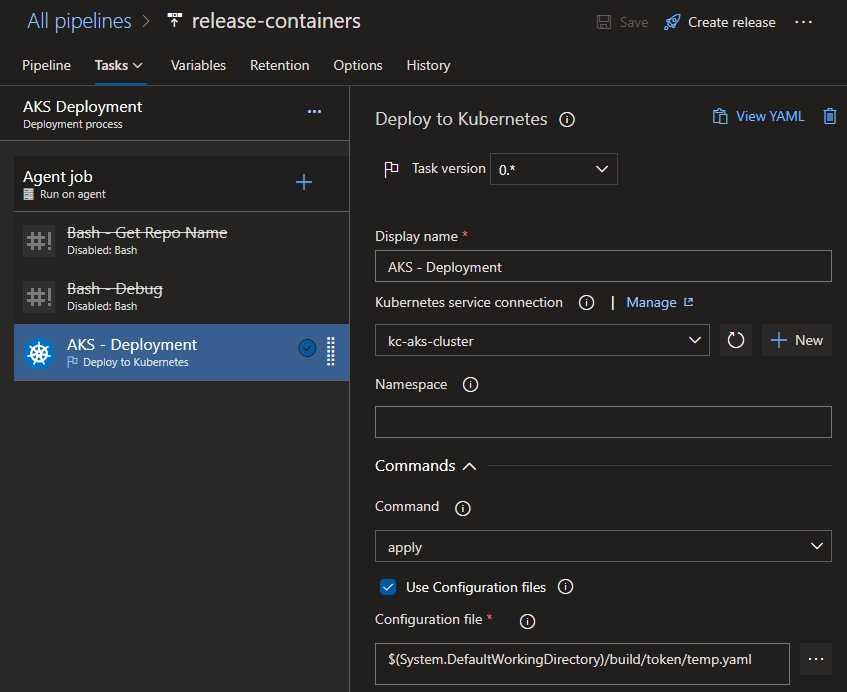
The AKS Deployment stage is simple, as there is only a single step to perform the deployment. The two disable tasks were mostly echo statements in bash for debugging purposes.
In the next step, we simply need to use the kubectl apply command to apply the .yaml file from our build. The file is located in the following path on our agent:
$(System.DefaultWorkingDirectory)/build/token/temp.yaml
Azure DevOps already has access to our subscription resources, so it can authenticate against the AKS cluster.
Testing
Once the release is created and deployed, we can test our web service running on AKS. First, we’ll need to get the external IP address for the service from AKS. The easiest way to do this is to use the cloud shell in the Azure portal.
Get the credentials for your AKS cluster using the instructions in the documents above. In order to test the service, we will need to get the external IP address first. In your cloud shell, you can type the following command to see services and their external IP/PORT configurations.
kubectl get services

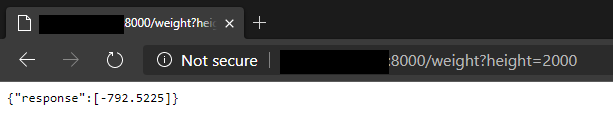
Once you have the external IP, you can visit the following URL in your browser to test the service:
http://YOUR_EXTERNAL_IP:8000/weight?height=2000
If your CI/CD release was successful, this would work. It may take a minute or two after the release completion for the external IP to be assigned and for the container to start.
Conclusion
This will conclude the series. I hope these blog posts and git repo were sufficient in showcasing some of the challenges and solution for operationalizing R models on Azure. Again, this series is in no way meant to be a comprehensive guide for a production implementation, but I hope that it helps in explaining some paths that may be taken. I hope that you’re able to leverage some portion of my findings in your own development and CI/CD processes. I believe that being able to deploy a single serialized model targeting different deployment targets through automated pipelines is a real productivity booster, and brings a lot of traceability to a process that is usually very manual.
- Getting Started
- Deployment Option 1 - Batch Processing
- Deployment Option 2 - Request/Response
- Part 6 - Creating Request/Response Web Service for R Model
- Part 7 - Containerizing R Web Service
- Part 8 - CI for Container Deployment
- Part 9 - CD for Container Deployment