
R Model Operationalization on Azure - Part 3
In part three of this series, we will create and configure an Azure Data Factory pipeline which can execute the inference notebook from the previous post, in Azure Databricks.
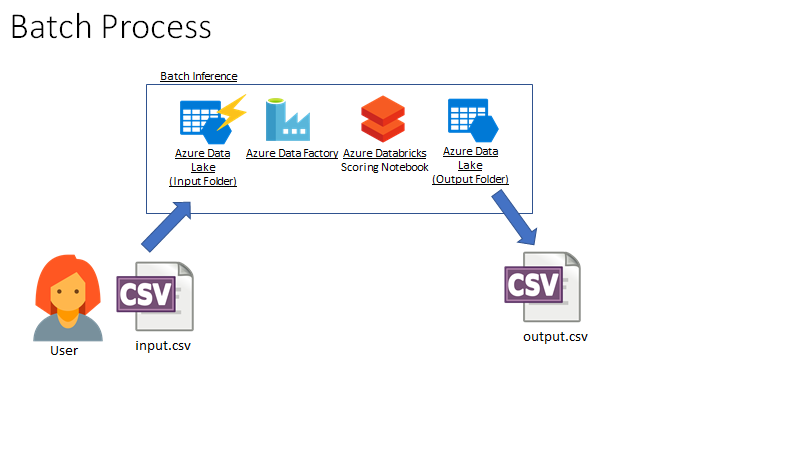
In this scenario, a user or external application lands a large file into a directory on Azure Data Lake Store Gen2. The upload event triggers an Azure Data Factory job to run our Databricks scoring notebook, which writes a file back to ADLS Gen2 in an output directory. The user or application can then receive the file with predictions from that directory.
As of the time of this writing (September 2019), this process is dependent on the multi-protocol access preview for ADLS Gen2 which enables Event Grid triggers for actions such as file creation and deletion. If you are unable to get preview access to this feature and want a similar scenario, I would suggest using Azure Blob Storage so you can utilize event triggers.
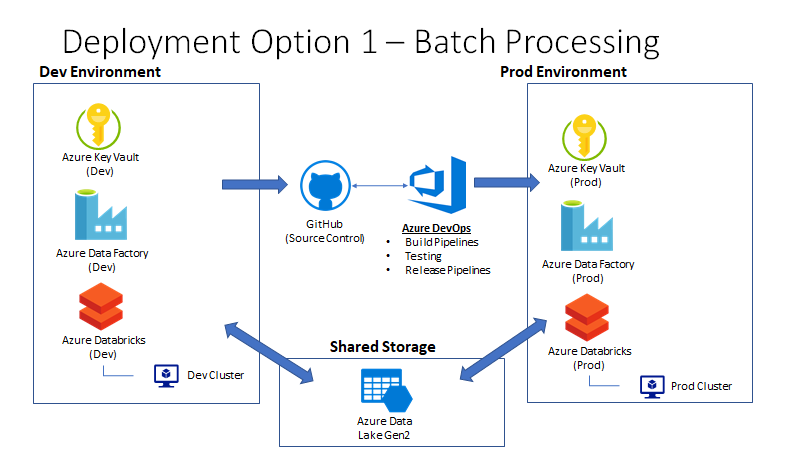
To enable this use case, we will need to create an environment with the related services. Note that in this example. I am sharing a single ADLS Gen2 instance between dev and prod.
You will need to:
1 - Create Azure Data Factory Service(s)
Create an Azure Data Factory service in your Azure subscription. If you are going to test with separate environments, I would suggest creating two separate factories (e.g: dev and prod) because you will need to give each factory access to a corresponding Azure Key Vault resource by defining an access policy. After creating your ADF services, you will need to go to each Azure Key Vault resource and assign an access policy that allows Get and List operations on secrets. Where you are given the option to select a service principal/user, just type in the name of your Azure Data Factory resource.
2 - Link ADF to Git
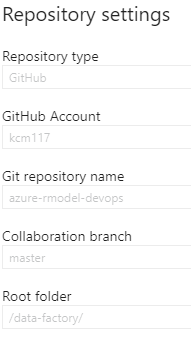
Link your ADF instance to your Git repository (GitHub or Azure Repos). My Git settings are below for reference. Be sure to set your root folder to /data-factory/ so that ADF only interacts with a subdirectory in your repository:
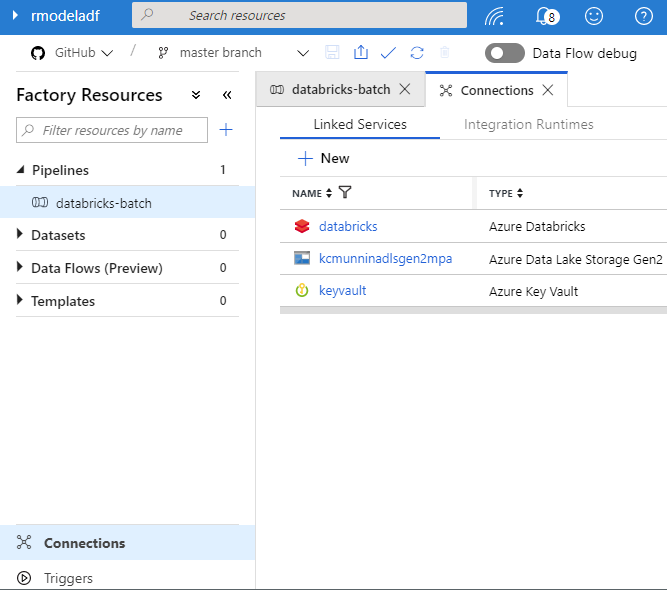
3 - Create Linked Services (Databricks, Key Vault, ADLS Gen2)
Create linked services for your ADLS Gen2 (or Blob Storage) account, Azure Databricks workspace and Azure Key Vault. this can easily be done in the UI.
Note - In the ADF UI, you will simply specify an existing cluster id for a cluster in your development Databricks workspace. There is a special need here to parameterize the “Existing Cluster ID” parameter of the Azure Databricks linked service. This is needed because we want our Azure DevOps pipelines to specify different cluster IDs based on if the pipeline is targeting development or production environments. We’ll specify the values in Azure DevOps later, but in Azure Data Factory this is accomplished by placing a special arm-template-parameters-definition.json file in the root of the /data-factory folder in the repo. This file basically specifies which parameters can be customized in the ARM template. Details of how this works can be found here. The value of importance in this .json file is the “existingClusterId”: “-“ property, which specifies that we want to override this value in the ARM template when deploying to other environments. You can find out the cluster ID for a databricks cluster by selecting it in the ADF linked services UI, or by using the following command in the databricks CLI:
databricks clusters list
The existing cluster id parameter will appear to be hard coded in the ADF Web UI, but adding that file to the root of the adf directory in the repo will allow it to be overridden via the ARM template at depoloyment time.
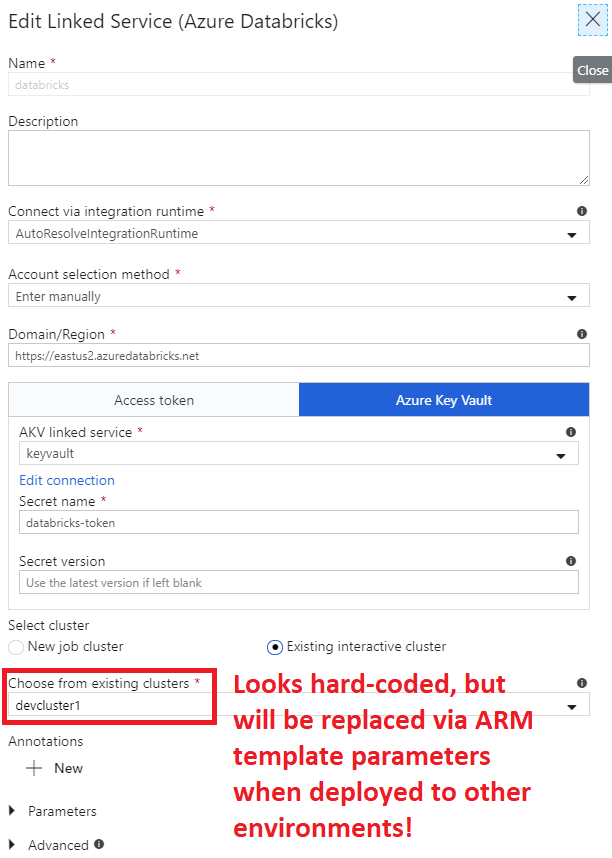
Add Secrets to Key Vault - Also, you’ll want to ensure that you’ve stored a secret called “databricks-token” in each key vault with an Azure Databricks access token for that environment. Instructions on how to generate a token in Databricks can be found here and steps for creating a secret in Azure Key Vault can be found here
4 - ADF Pipeline
We’ll need an ADF pipeline to run the Databricks inference notebook with the following characteristics:
-
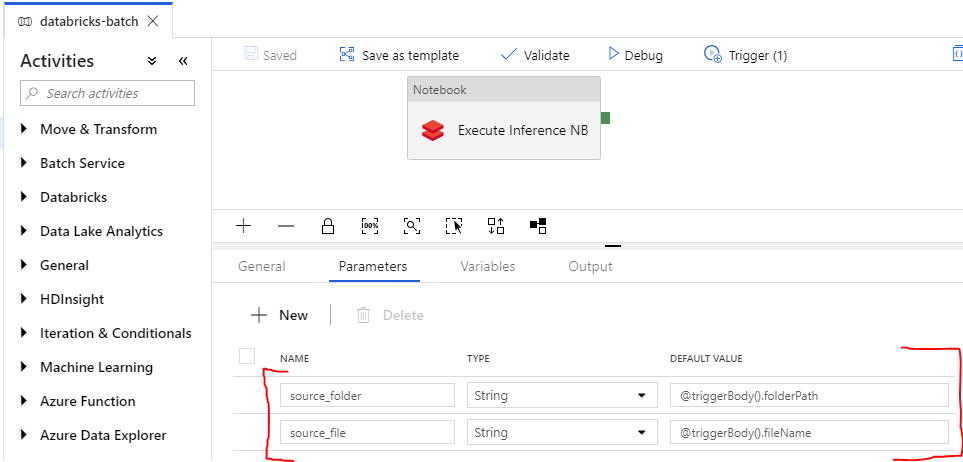
Parameters for the source folder and source file, which are passed in from the ADLS Gen2 trigger.
-
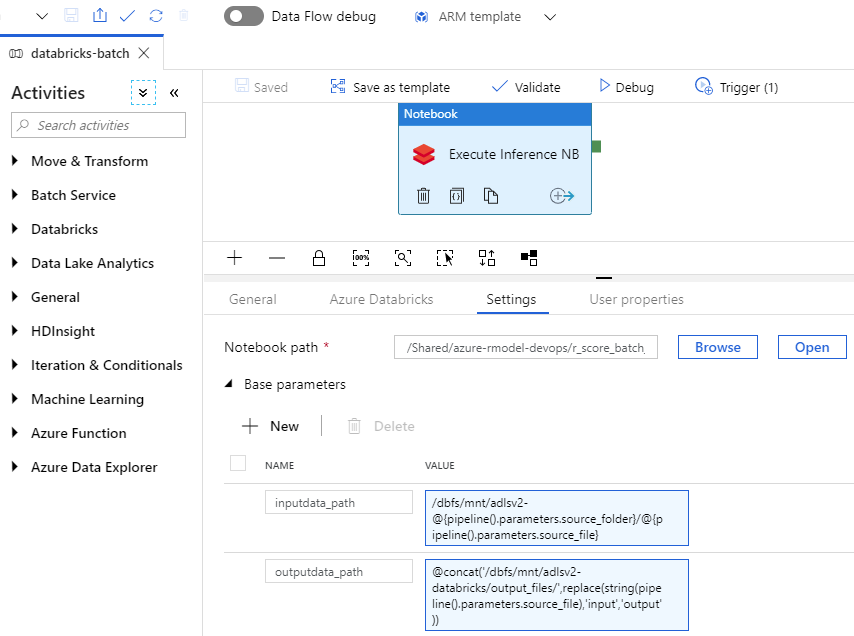
Azure Databricks Notebook Activity - Create a notebook activity with the notebook path /Shared/azure-rmodel-devops/r_score_batch_databricks, which is where I store the notebooks in the Databricks woprkspace. We will need to pass parameters from the ADF pipeline to the notebook parameters inputdata_path and outputpath_data which we discussed previously.
-
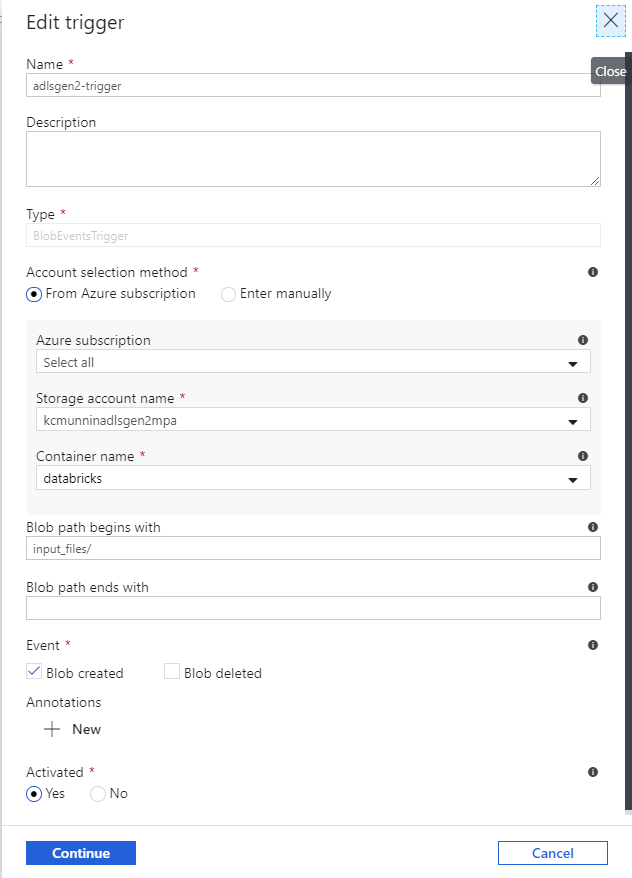
Trigger for ADLS Gen 2 (or blob storage). Configure a trigger in the factory and attach it to the pipeline. We’ll have the trigger scoped to the /input_files directory within the file system (or container).
Once you have a data factory with the appropriate pipeline (with parameters), linked services, linked to git, triggers and arm-template-parameters-definition.json file in the root of your adf folder in your repoi…you’re good to go from the ADF side. If you’re actively testing/debugging the pipeline in the ADF Web UI, you can run the pipeline via the debug function with the following parameters to test if it is working, assuming that the following criteria are met:
- The databricks inference notebook is in the correct location specified in the function.
- Placed the r_input_file1.csv file in the input_files folder within your “databricks” file system on ADLS Gen2
- You’ve created an output_files directory within your “databricks” file system on ADLS Gen2.
# ADF pipeline parameters for an ad-hod, debug run
source_folder = databricks/input_files
source_file = r_input_file1.csv
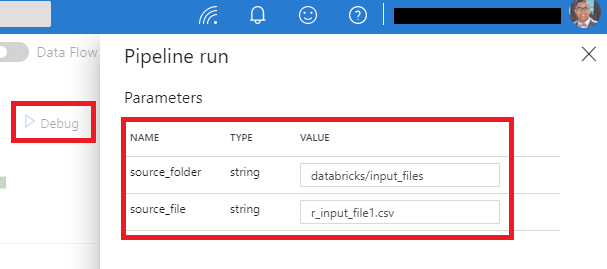
- Set the parameters equal to the above values (or to the paths you’ve created in your own environment) to test the process.
Congratulations! At this point, you now have a parameterized ADF pipeline that can execute your parameterized Azure Databricks notebook for scoring .csv files, with your trained R model, whenever a new file arrives in ADLS Gen2. All you must do is publish the pipeline via the ADF UI, and this should be active in your development environment. In the next series, we will explore the Azure DevOps steps necessary to add CI/CD steps for the Azure Databricks and Azure Data Factory components we have just built.
- Getting Started
- Deployment Option 1 - Batch Processing
- Part 2 - Azure Databricks & Parameterized Notebooks for Inference
- Part 3 - Azure Data Factory Pipelines
- Part 4 - CI for Databricks
- Part 5 - CD for Databricks and ADF
- Deployment Option 2 - Request/Response