
R Model Operationalization on Azure - Part 8
Welcome to Part 8. Parts 8 through 9 of the series will focus on CI/CD for the second deployment option, which targets creating a containerized request/response web service.
Build Pipeline
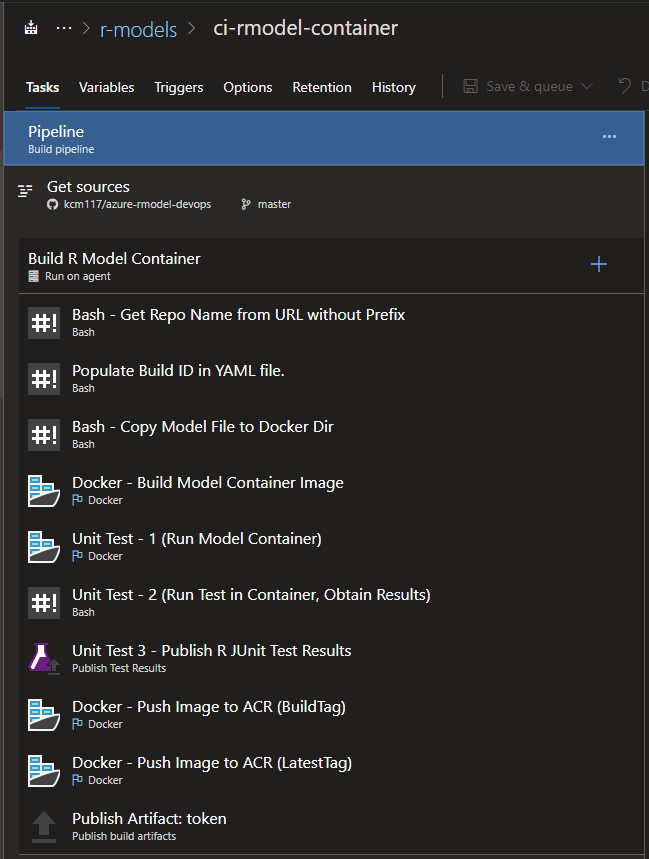
In the screenshot above, we can see an overview of the build tasks for our inference container. Some of the initia configuration and steps are similar to what was done for the Databricks build. Our goal in this build process is to:
- Have the build trigger for pull requests against master and commits to master where changes impact the /docker or /models directory.
- Build the Docker container image that contains our inference scripts, tests and serialized model file.
- Execute the tests inside the container and retrieve the results.
- If there are test failures, fail the build.
- If the test passes for a feature branch pull request against master, the build succeeds
- If the test passes for the master branch, the image is pushed to Azure Container registry and an artifact is published for a release pipeline.
Again, the build pipeline can be found in the repo here.
Configuration
Variables and Variable Groups
For this pipeline, there are no custom defined pipeline variables. There is a Linked Variable Group defined, which points to our dev key vault. The only secret referenced here is the acr-name secret in the key vault, which contains the name of your Azure Container Repository, for example: kcacr12345.azurecr.io
Triggers
We will utilize continuous integration and pull request triggers in this build. Our goal is to have the build run for changes on the master branch, and to run for pull requests against the master branch.
Continuous Integration Trigger:
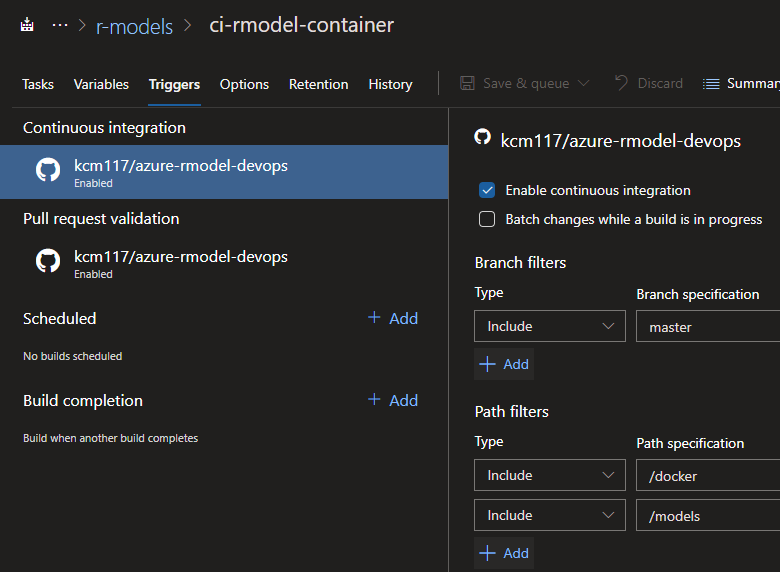
For the CI trigger, we enable CI and set the branch filter to master. We also need to set path filters for /docker and /models so that changes to files in these directories trigger the build.
Pull Request Trigger:
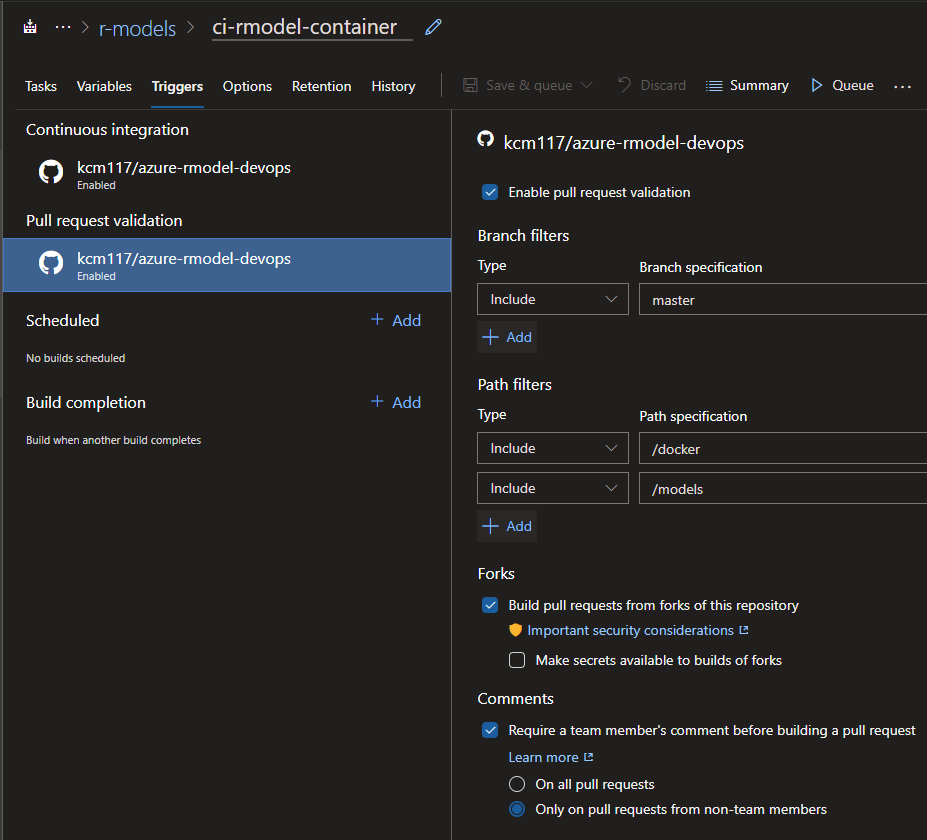
For the PR trigger, we enable PR validation and set a branch filter for the master branch. Again, we set path filters for /docker and /models so that updates to those paths in a PR trigger the validation.
YAML File - Parameterization
Similar to the Databricks job json definition for the batch deployment option, we need to parameterize a file with the name of our repo and a few other variables. This time, the file is a kubernetes-deployment.yaml file which defines a service definition for a Kubernetes deployment. The file itself is not used in the build process, but it is produced as a build artifact for successful build run on the master branch because the file is used by the release process. We used the bash tool sed to perform text replacement for the following variables:
- #{BUILDID}# : This is set to the unique build id for a specific build execution.
- #{service-name}# : This is set to the name of the repository
- #{acr-name}# : this is the value we have stored in the Azure Key Vault, accessible by the linked variable group, which contains the name of our Azure Container Registry service.
Copy Model file
For this step, we need to copy the serialized model from the /model directory in the repository to the /docker/app directory. Remember, we configured our Dockerfile to copy all files from /docker/app into the container image when creating the image.
Build Image
In this step, we use a native Azure DevOps docker step to actually build the image.
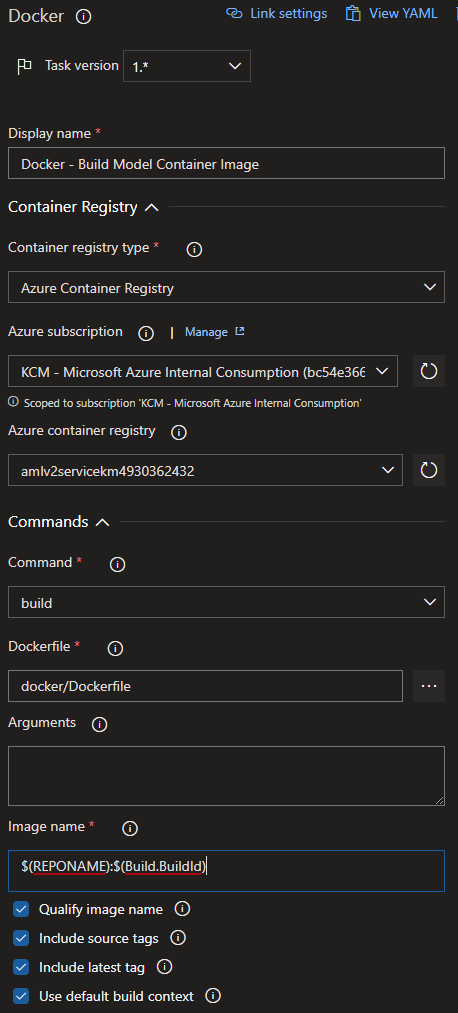
Fill out the required parameters. Most of them are self explanatory, you will need to point to the Azure Container Registry you wish to use, along with the path to the Dockerfile to build the image. Also notice that we set the docker command to build, since we are building a container image. I do feel the need for a longer explanation for the Image Name parameter in this step.
Docker images are usually referred to by a name and tag, in the format NAME:TAG. In our build, we want the name of the image to correspond with the repo name, and the tag to correspond with a unique build id. This will make a specific container image in our Azure Container Registry easily traceable to a unique build.
Run Container & Tests
For the next two steps, we need to actually run the container on the build agent host, and then execute the code inside the container to perform the tests we defined via the testthat framework.
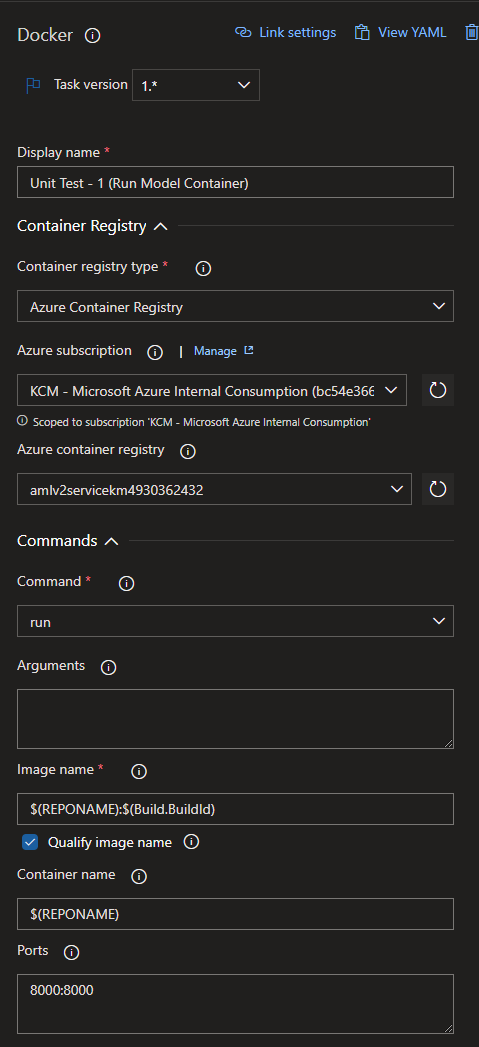
First, we need to make sure the container is running, so we execute a Docker task with a run command, as seen above. We need to make sure we reference the image name and tag correctly (via our parameterized variables), and tell the container to run on port 8000.
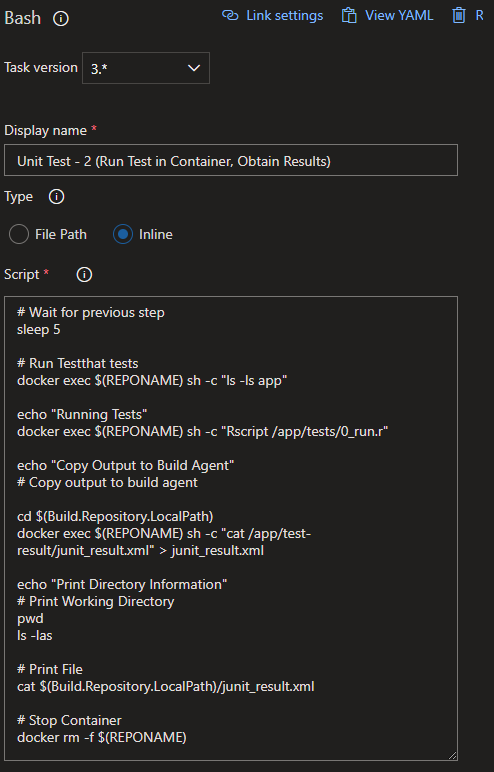
A bash script is used in the next step to actually submit commands to the container. Our goal is the run the tests we defined, get a JUnit formatted .xml results file outputted, and then copy the test results from inside the container to the build agent host, so we can display the test results as a part of the build process. I’ve commented each line of the bash script to explain the steps.
Publish Tests
After our tests have ran and we have the results .xml file on the build agent, we can publish the test results just as we did in the Databricks build earlier in the series.
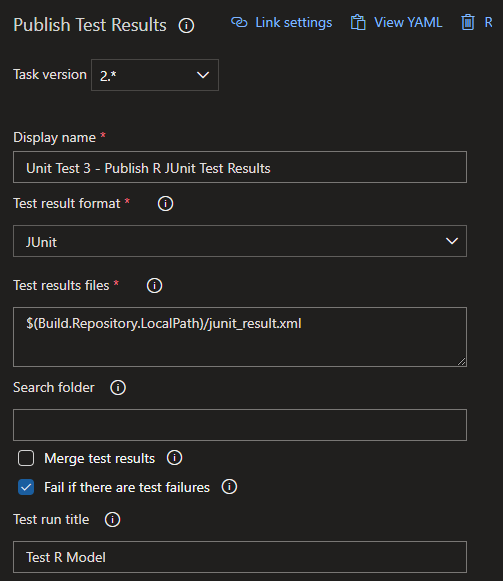
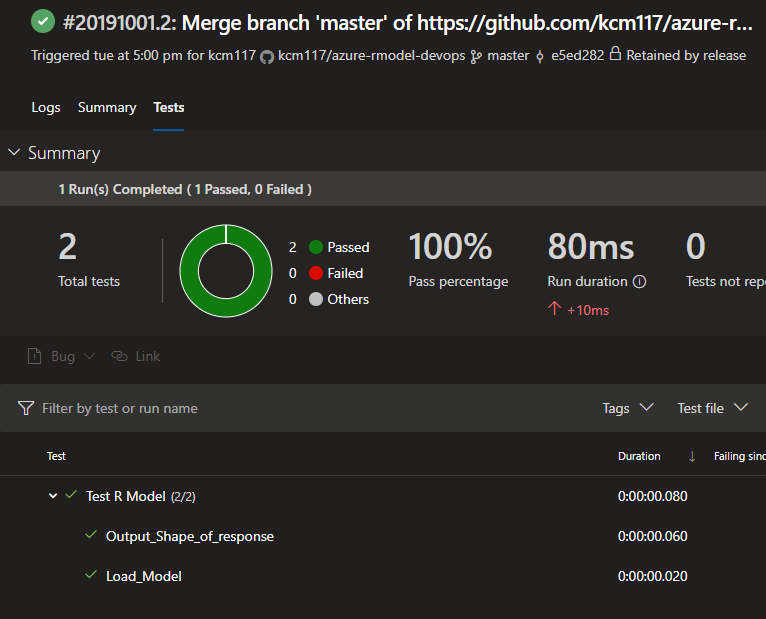
Ensure that the “Fail if there are test failures” option is checked if you want your builds to fail appropriately. Once the tests are ran and shown in an execution of the build pipeline, it looks like this:
Push image to ACR (Build Tag and Latest)
For the next three tasks in the pipeline, we are using a special Control Option so that these tasks only execute when a certain criteria is met. In our build, we only want a docker image to be pushed to ACR if our tests have succeeded, and the build was performed on the master branch.
Special Note: Control Option (on all subsequent tasks)
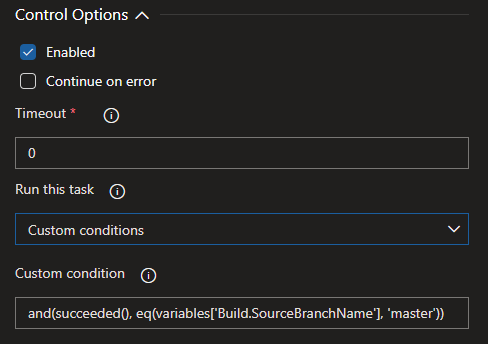
We can expand the Control Options section of the next few steps and input the following expression to achieve our goal via a Custom Condition:
and(succeeded(), eq(variables['Build.SourceBranchName'], 'master'))

There are two steps here that are identical, with only one change. Please note that I’ve only included a screenshot of the first step above. We want to have a task to docker push the successfully tested image to ACR. We push the image twice in two tasks so that one image contains the build ID as the tag, and one image contains the tag value of “latest” so that the most recent successfully tested and built image for the repo is always available via the master tag.
Docker Push Task 1 uses the Image Name: $(REPONAME):$(Build.BuildId) Docker Push Task 2 uses the Image Name: $(REPONAME):latest
Publish Token
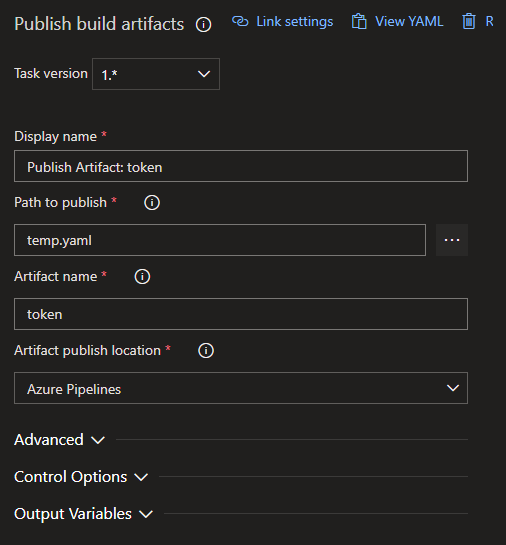
For the last step, we publish an artifact containing our Kubernetes service .yaml file. This is the same file that was parameterized earlier in the build. It will contain all the information needed by the upcoming release pipeline to deploy the image from Azure Container Registry to Azure Kubernetes Service. We will need to reference the artifact name and path in Part 9.
- Getting Started
- Deployment Option 1 - Batch Processing
- Deployment Option 2 - Request/Response
- Part 6 - Creating Request/Response Web Service for R Model
- Part 7 - Containerizing R Web Service
- Part 8 - CI for Container Deployment
- Part 9 - CD for Container Deployment